Step 2 — Defining your targets —
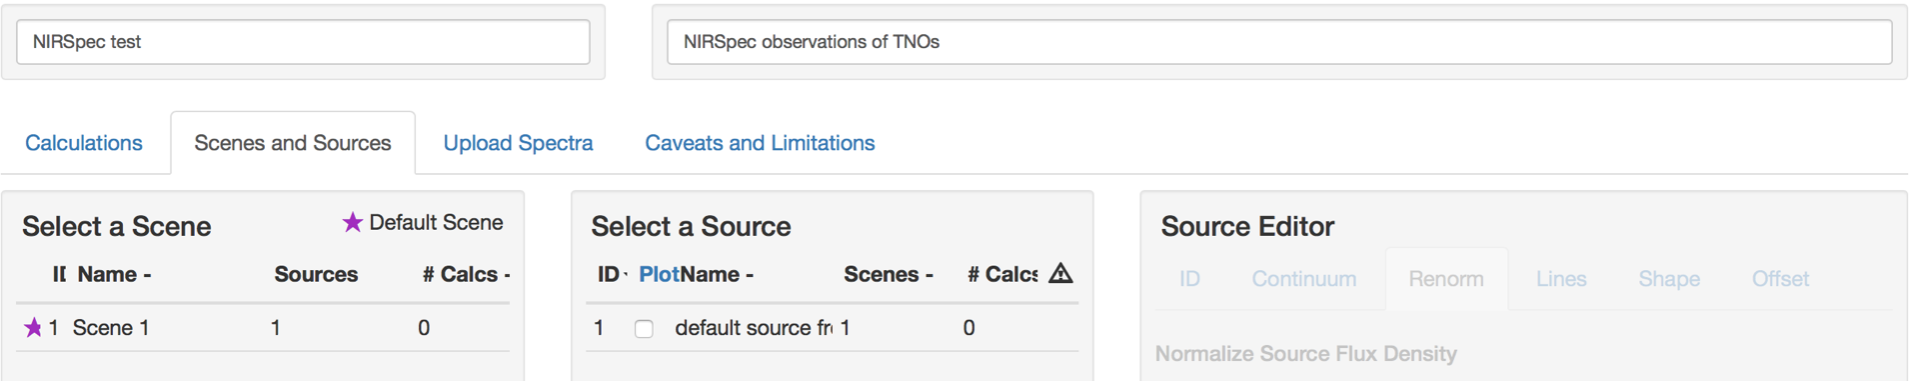
In the following, we have filled the top-row fields with generic information. We enter the Scenes and Sources thumbnail: there you can define a Scene (column 1), made of various Sources (column 2), which you specify in the Source Editor (column 3).
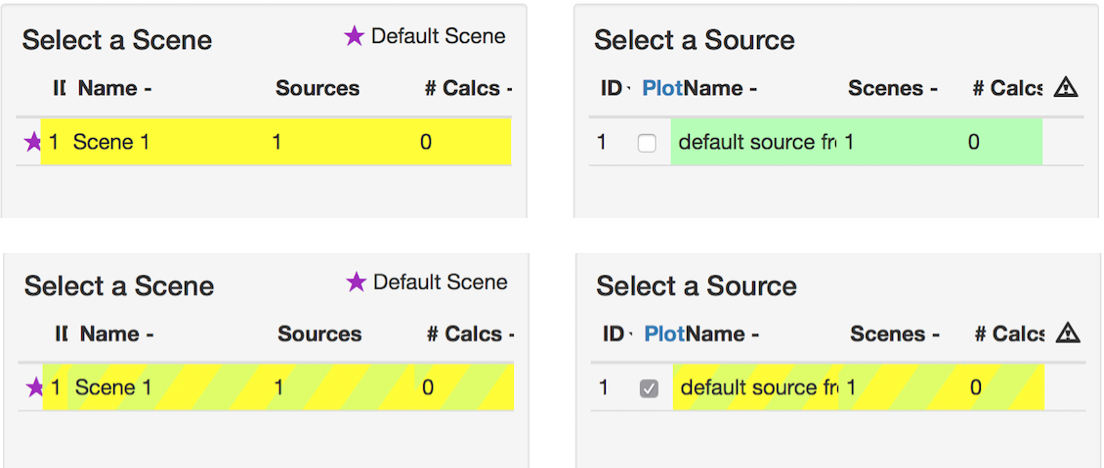
A default scene and target are available. Be sure to select both, so that you can modify both the name and content of the scene (which can eventually contain more than one source), and the source itself. A color coding exists to help you with knowing if you have selected both. If you have selected only the source, modification to the scene will not apply.
Source Editor — ID
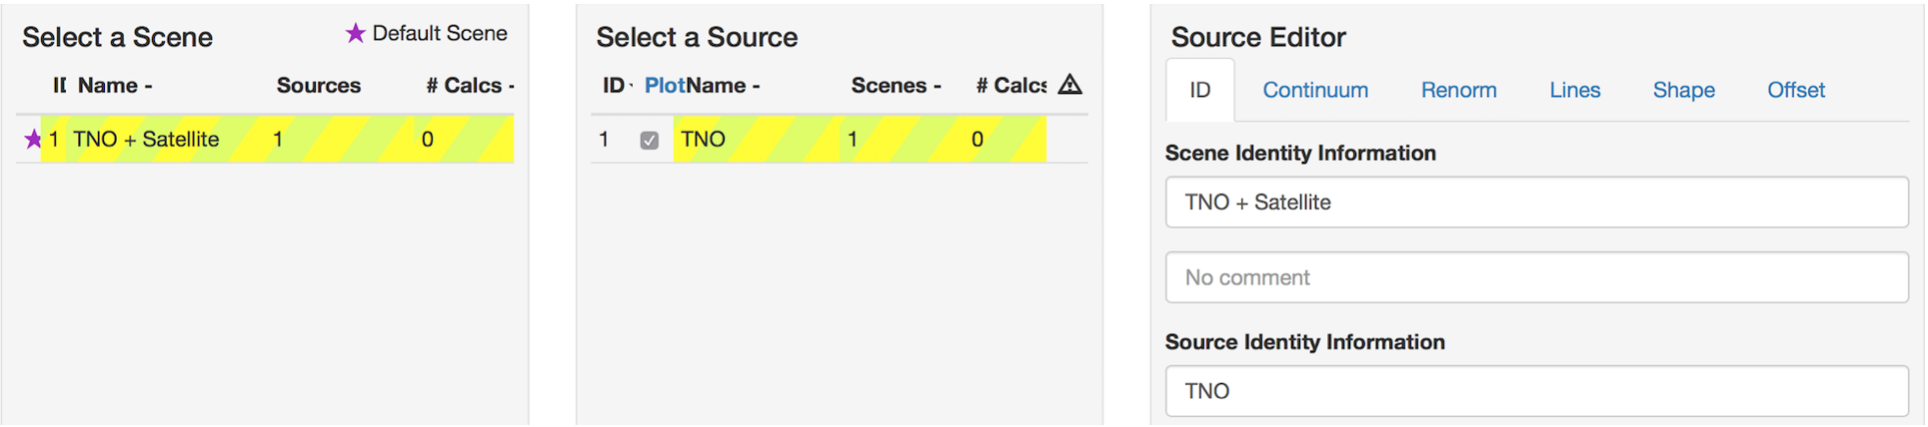
We are now going to focus on the third column, the Source Editor, where you can adjust the source to the characteristics of your target. The first aspect to modify is the ID: you can name the scene (in the following example TNO+Satellite – at this point if you have not properly selected the scene, modifications to its name will not be applied), and the source (TNO). Be sure to hit the save button often to see modifications applied.
Source Editor — Continuum
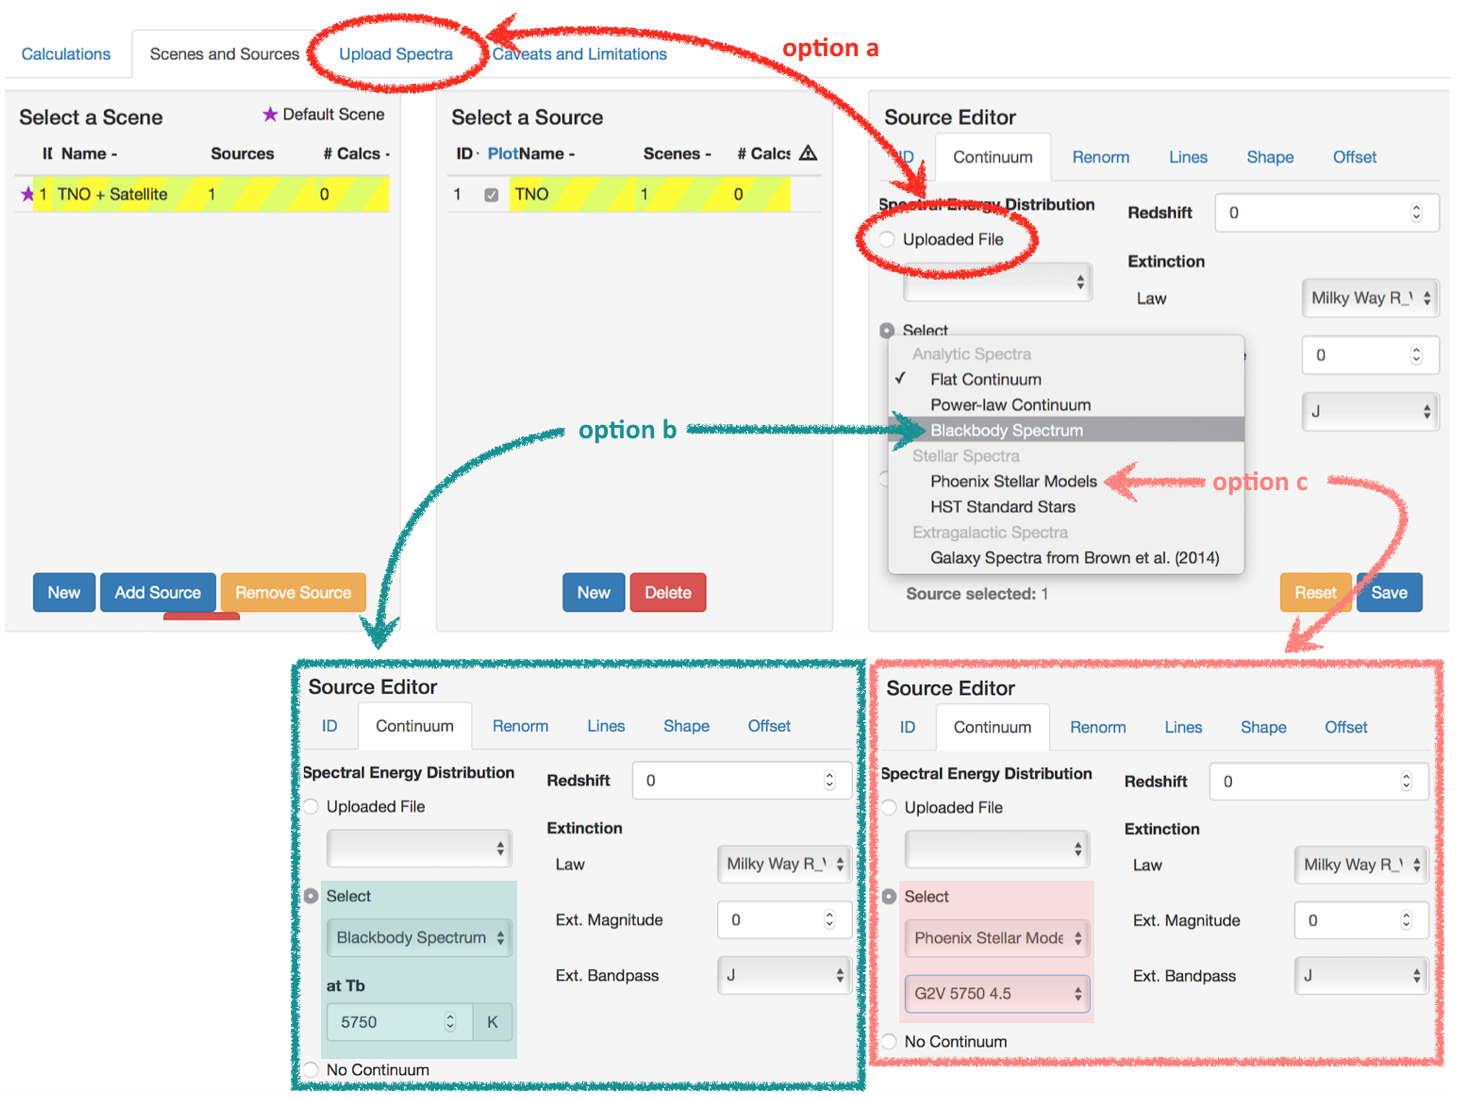
Once you have named your target, you need to define its continuum. Three options exist for doing so.
- Option a: you can upload your own spectra to use in the ETC. Uploaded spectra need to be in mJy with a wavelength in microns. Once loaded, they will appear in a drop-down menu under the Continuum thumbnail of the Source Editor
- Option b: you can select a Blackbody spectrum from the drop-down menu, and adjust its temperature to what you need.
- Option c: you can select a Stellar Spectrum, in this case we recommend to use a G2V star available from the drop-down menu of the Phoenix Stellar Models.
The main difference between the blackbody and the stellar spectrum options are the time that the ETC will take to calculate the SNR when you adjust your observing strategy (seen in the next step): the blackbody option is faster, it can be a good idea to start with this continuum to actually adjust the number of groups and integrations for your strategy, then come back to the source editor and use a stellar spectrum to check.
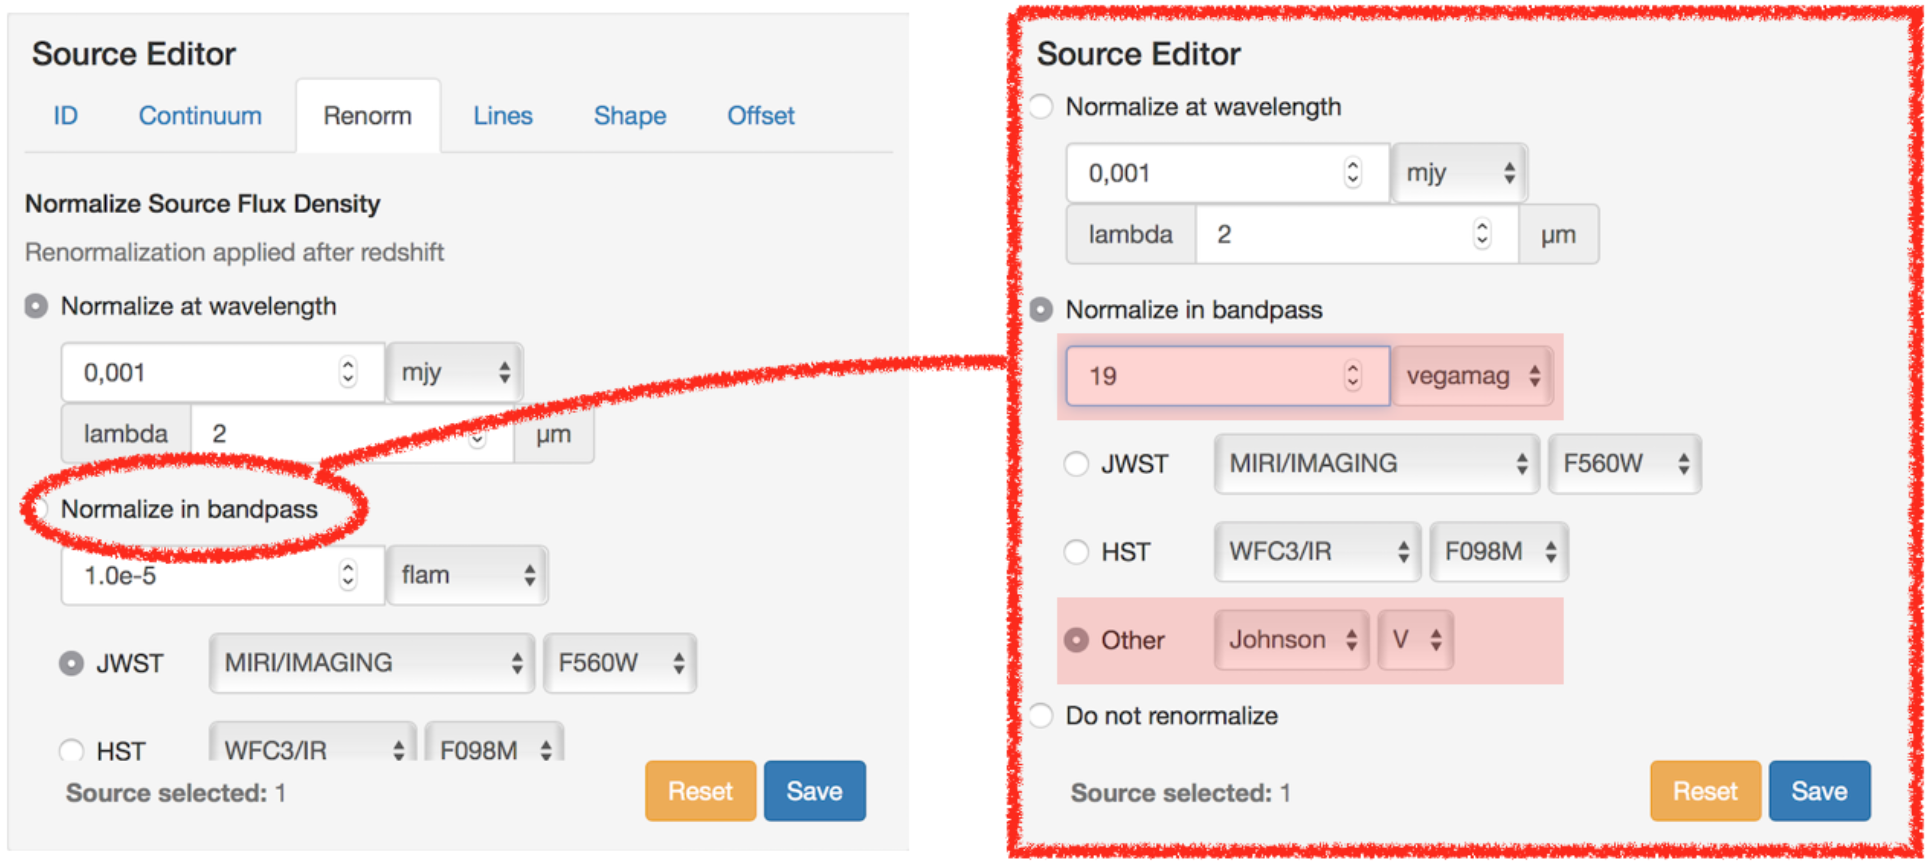
Source Editor — Renorm
Once you have selected the correct continuum, you may need to renormalize it (unless you have uploaded your own spectrum, in this case you do not need to do anything else). Under the Renorm thumbnail you will find several options: either normalize a specific flux at a specific wavelength, or adjust the magnitude in a given bandpass (this option is probably the most useful for small bodies in the solar system). You will be able to have a look at what the spectrum looks like when you scroll down to the Source Spectrum Plots.
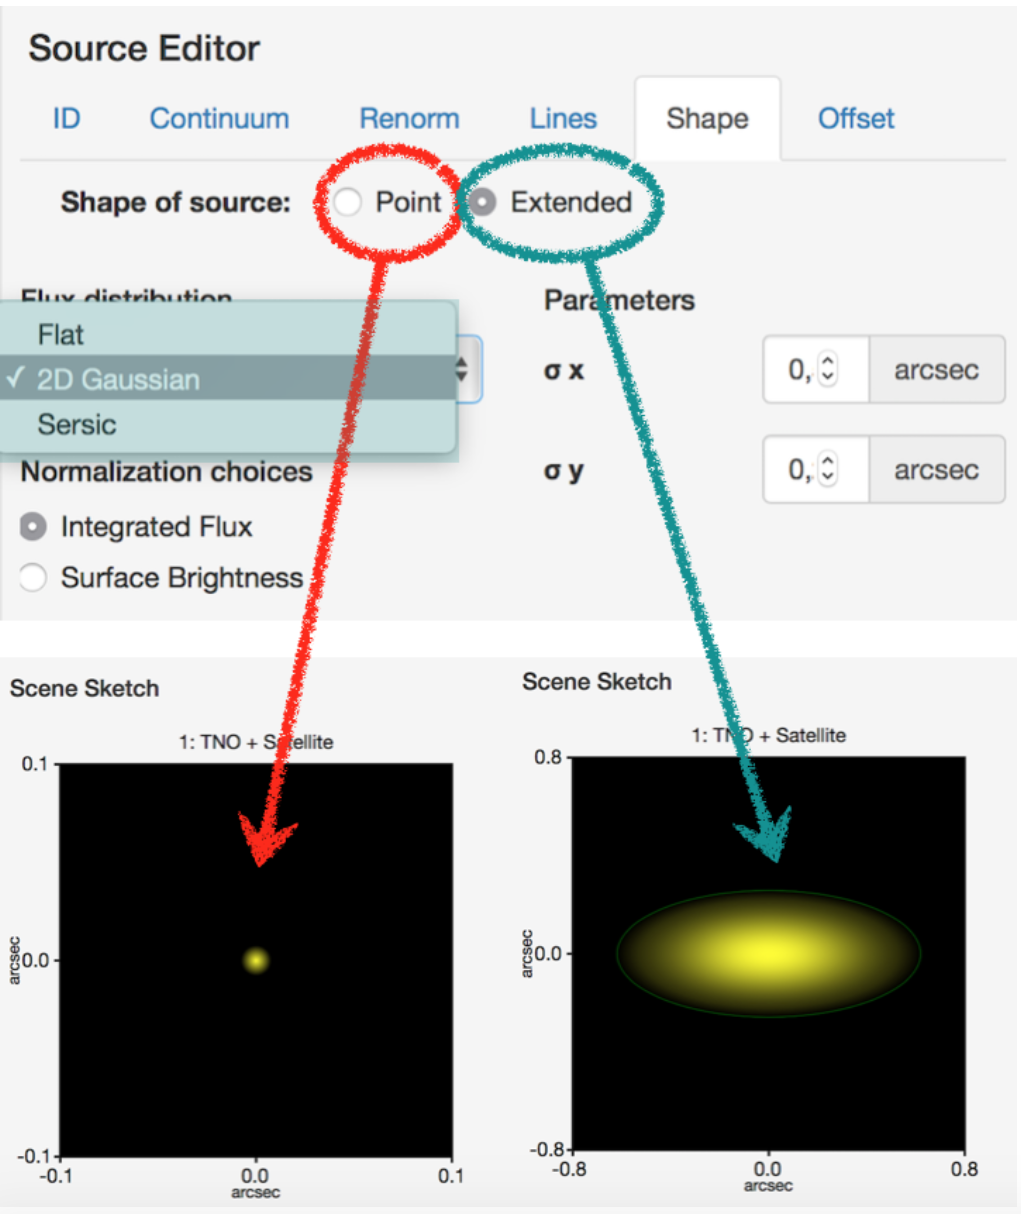
Source Editor — Shape
The thumbnail Shape is useful when observing comets and other extended objects. It allows you to choose either a point-source target, or an extended object. Unfortunately, a true cometary profile is not implemented yet. The best you can do at this stage is to select a 2D gaussian profile, and modify the x and y axis sizes in order to create a fake comet.
Note: the Scene Sketch frame shown on the left is available when scrolling down, next to the Source Spectrum Plots.
At this stage, you have defined one source in your scene. You can add as many sources as required in the same scene, including for example a thermal component to the same object if you wish to coordinate some MIRI observations to your NIRSpec observations. In the following, we will add a satellite to our TNO, so to explore the Offset thumbnail.
Adding a source to the scene & Source Editor — Offset
By adding a second source to your scene, you can for example add a thermal component to the same target. This will be interesting for example when you wish to coordinate some MIRI observations to your NIRSpec observations. In this case, you will keep the second source at the same location as the first source (by default these are placed in the center of the scene), normalize it properly and remember to always select both the IR and thermal components for your calculations. However, to explore the Offset options, we are going to add a satellite to our target.
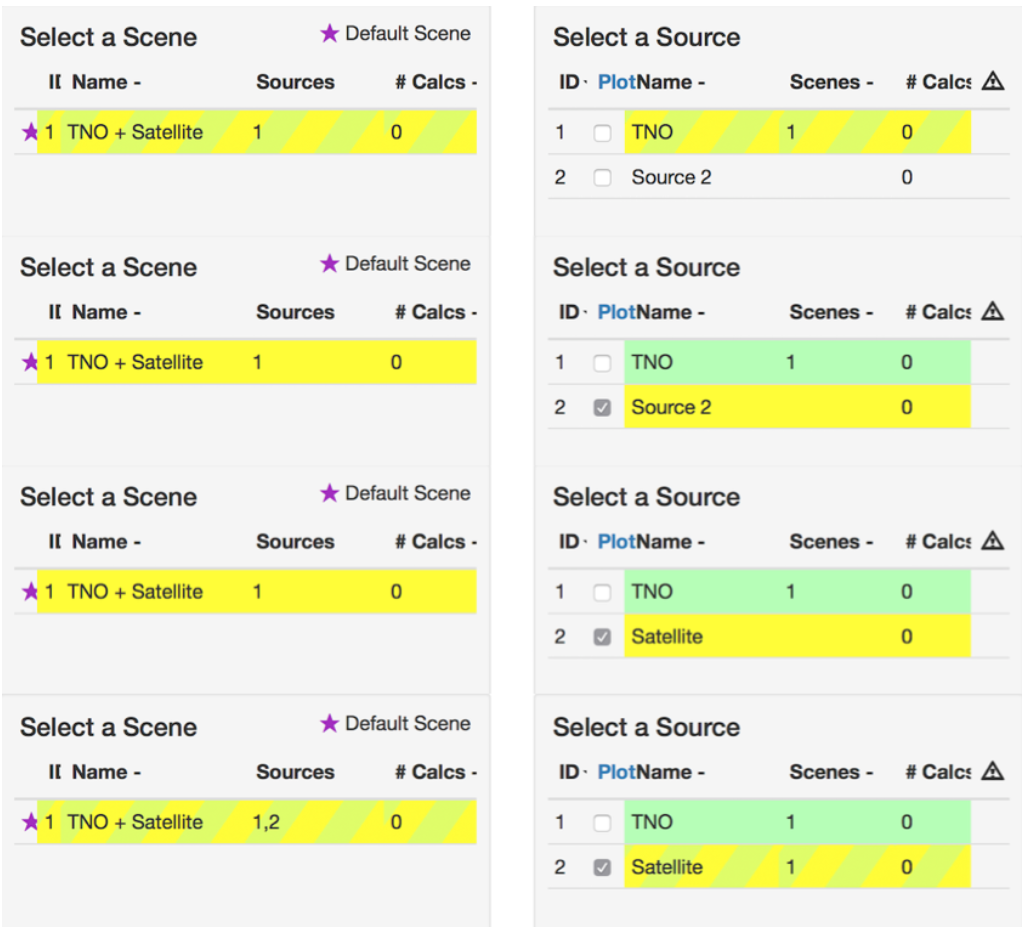
- First, hit the New button in the source column to create a new source.
- Select the Source 2, so you can properly ID it.
- At this point, the source is created, but it does not belong to any scene.
- To properly assign the source to the scene, keep it selected, select the scene, and hit the Add Source button on the Scene column.
You see in this example that:
- Column Scenes: Scene 1 contains sources 1 and 2
- Column Sources: Source 1 and Source 2 are included in Scene 1
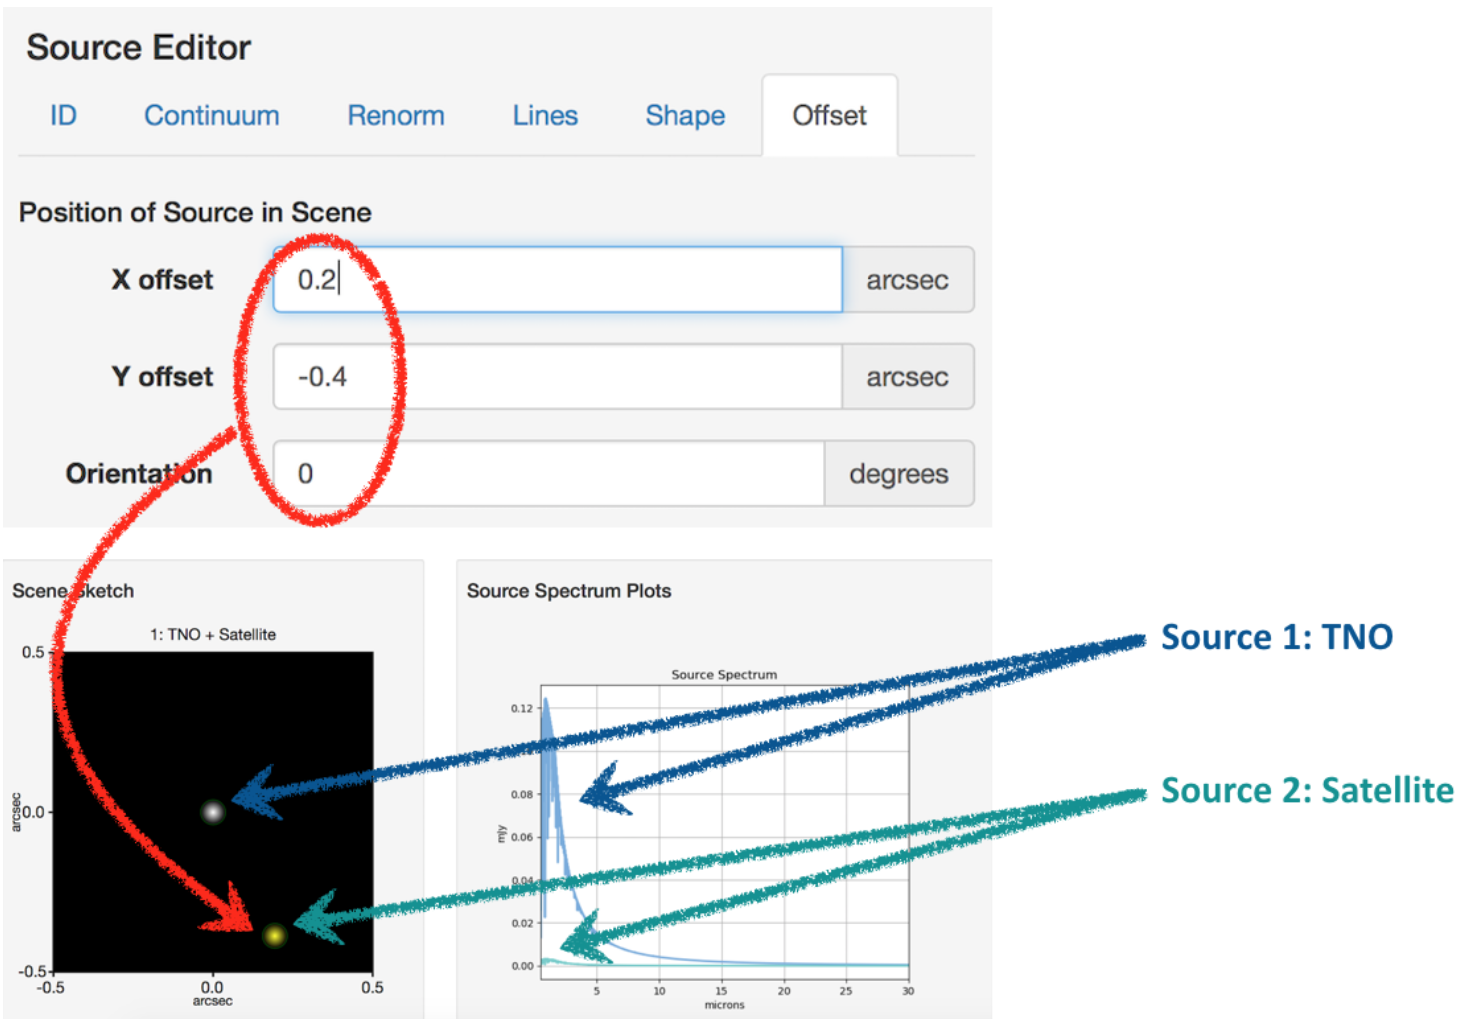
Your subsequent actions should be the same as for the first target, i.e. set up a continuum for the spectrum, normalize it (in our example we set up a satellite with a V magnitude of 23), and provide a shape for it. In case of a thermal component, do not use any offset, just normalize the thermal properties to the characteristics of your target.
By default, the source is places in the center of the scene. You can offset it, even to locations outside the field of view of the instrument. If you select several sources, the Scene Sketch and Source Spectrum Plots will show the contributions from all these selected sources.
Now that your scenes and sources are properly defined, you can use them in calculations for various NIRSpec (and other instruments) configurations, in order to define the observing strategy which will best suit your science objectives.